Creating 3D crystal religious pictures involves a combination of technology and artistry. Here’s a general outline of how you might go about it:
- Selecting the Image: Choose a religious image that you want to convert into a 3D crystal picture. This could be a painting, a drawing, a photograph, or any other visual representation.
- Digital Conversion: The selected image needs to be converted into a digital 3D model. This can be done using various software programs like Blender, Autodesk Maya, or ZBrush. Alternatively, if you have a 3D scanner, you can scan a physical image or object to create a digital model.
- Adjustments: Once the image is in digital form, you may need to make adjustments to ensure it translates well into a 3D space. This could involve tweaking the lighting, shadows, textures, and overall composition.
- Rendering: Render the 3D model to create high-quality images from different angles. This step is crucial for visualizing how the final crystal picture will look.
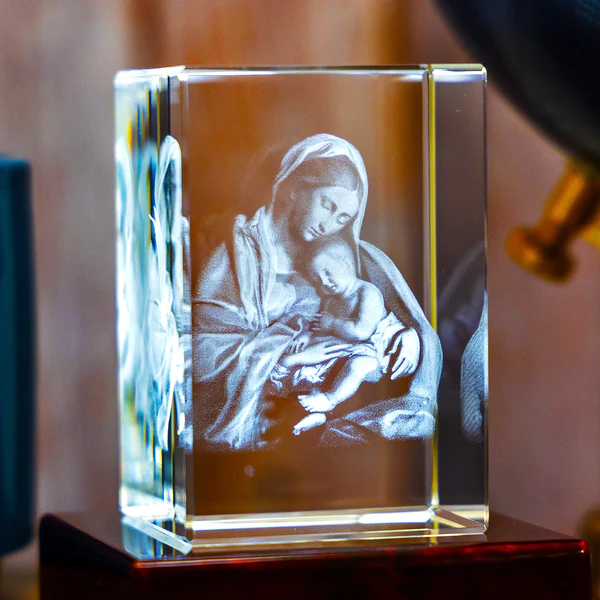
- Laser Etching: The rendered 3D image is then etched into a block of crystal using a laser engraving machine. The laser burns the image into the crystal’s surface, creating a three-dimensional effect.
- Finishing Touches: After the laser etching process, the crystal may undergo additional polishing or cleaning to enhance its clarity and shine.
- Mounting or Displaying: Depending on the design and preferences, the finished crystal picture can be mounted on a base, placed in a frame, or displayed in other ways to showcase its beauty.
Keep in mind that creating 3D crystal religious pictures requires both technical skills in 3D modeling and access to specialized equipment like laser engraving machines. If you don’t have the necessary expertise or equipment, you may consider outsourcing this task to professional services specializing in personalized 3D crystal engraving.